> ## Documentation Index
> Fetch the complete documentation index at: https://bruno-a6972042-mintlify-71caebff.mintlify.site/llms.txt
> Use this file to discover all available pages before exploring further.
# Provider
export const Video = ({src, ...props}) => {
return
;
};
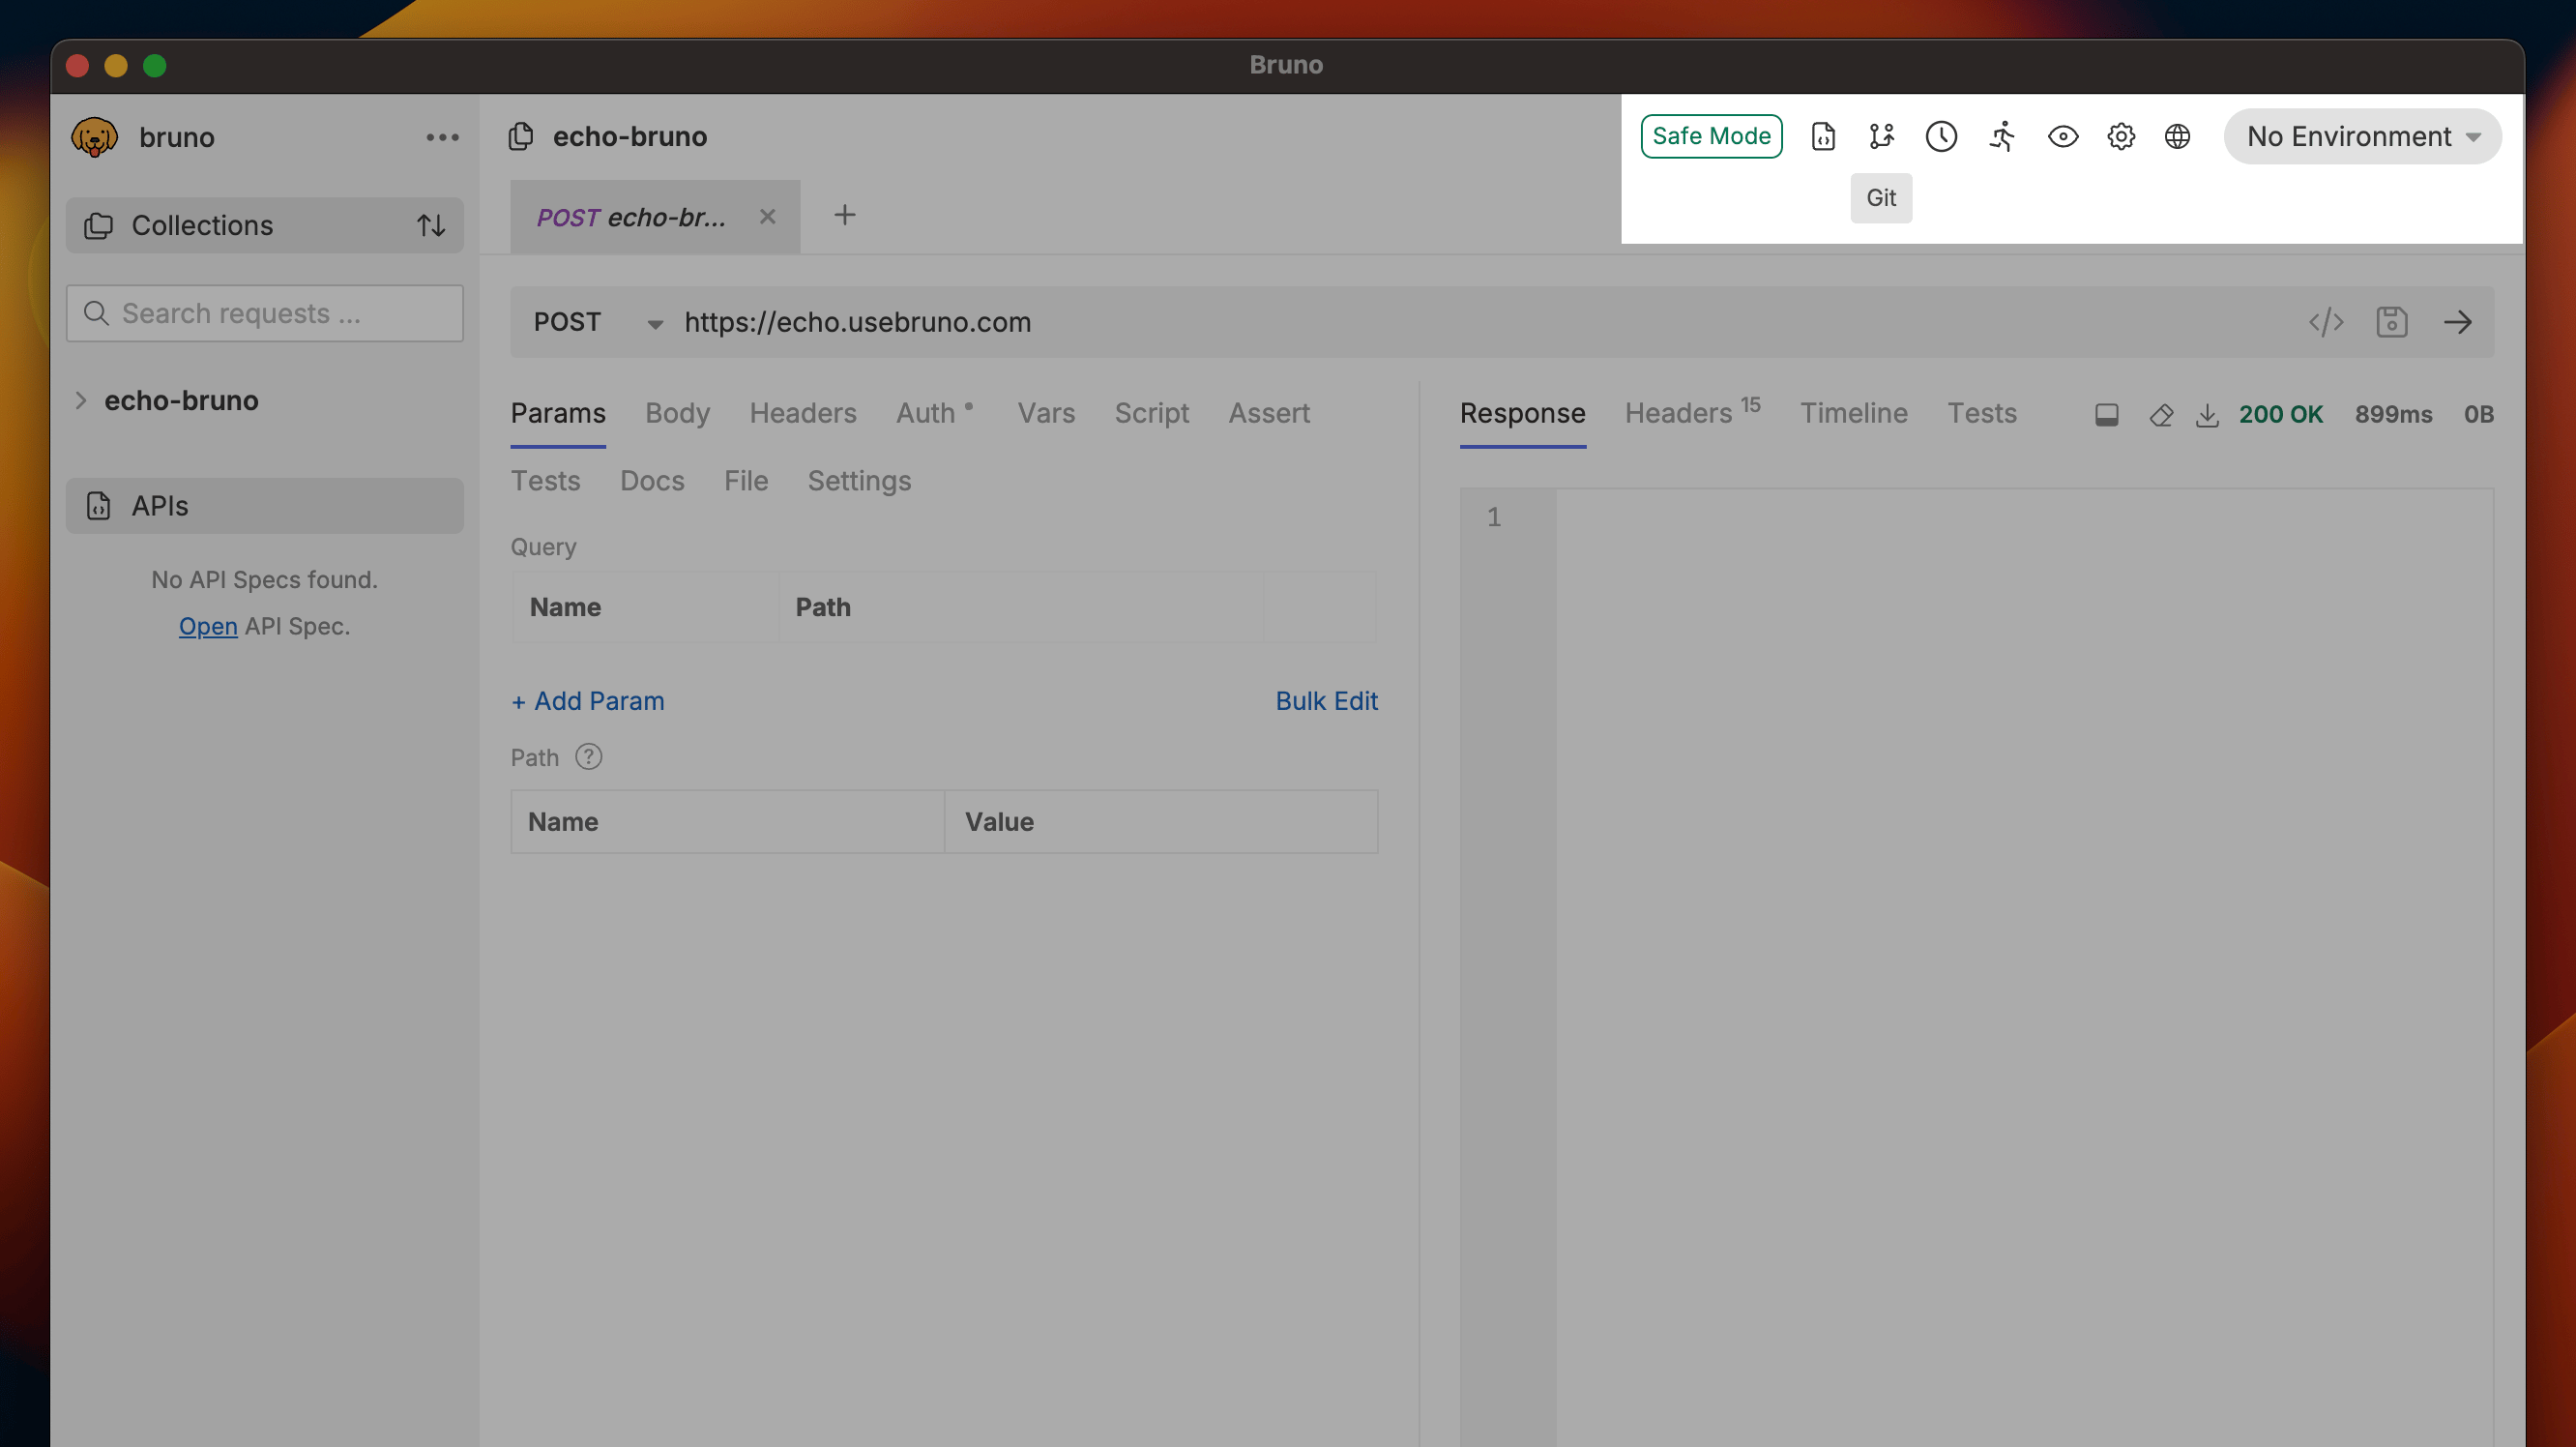
## Initializing Git
Initializing Git in Bruno is the first step towards managing your API collections with version control. It's easy and quick to set up. Follow the steps below to initialize Git.
1. Launch the **Bruno app**.
2. Navigate to the collection you want to initialize with Git.
3. Click on the **Git Icon** in the top-right corner of the navbar.
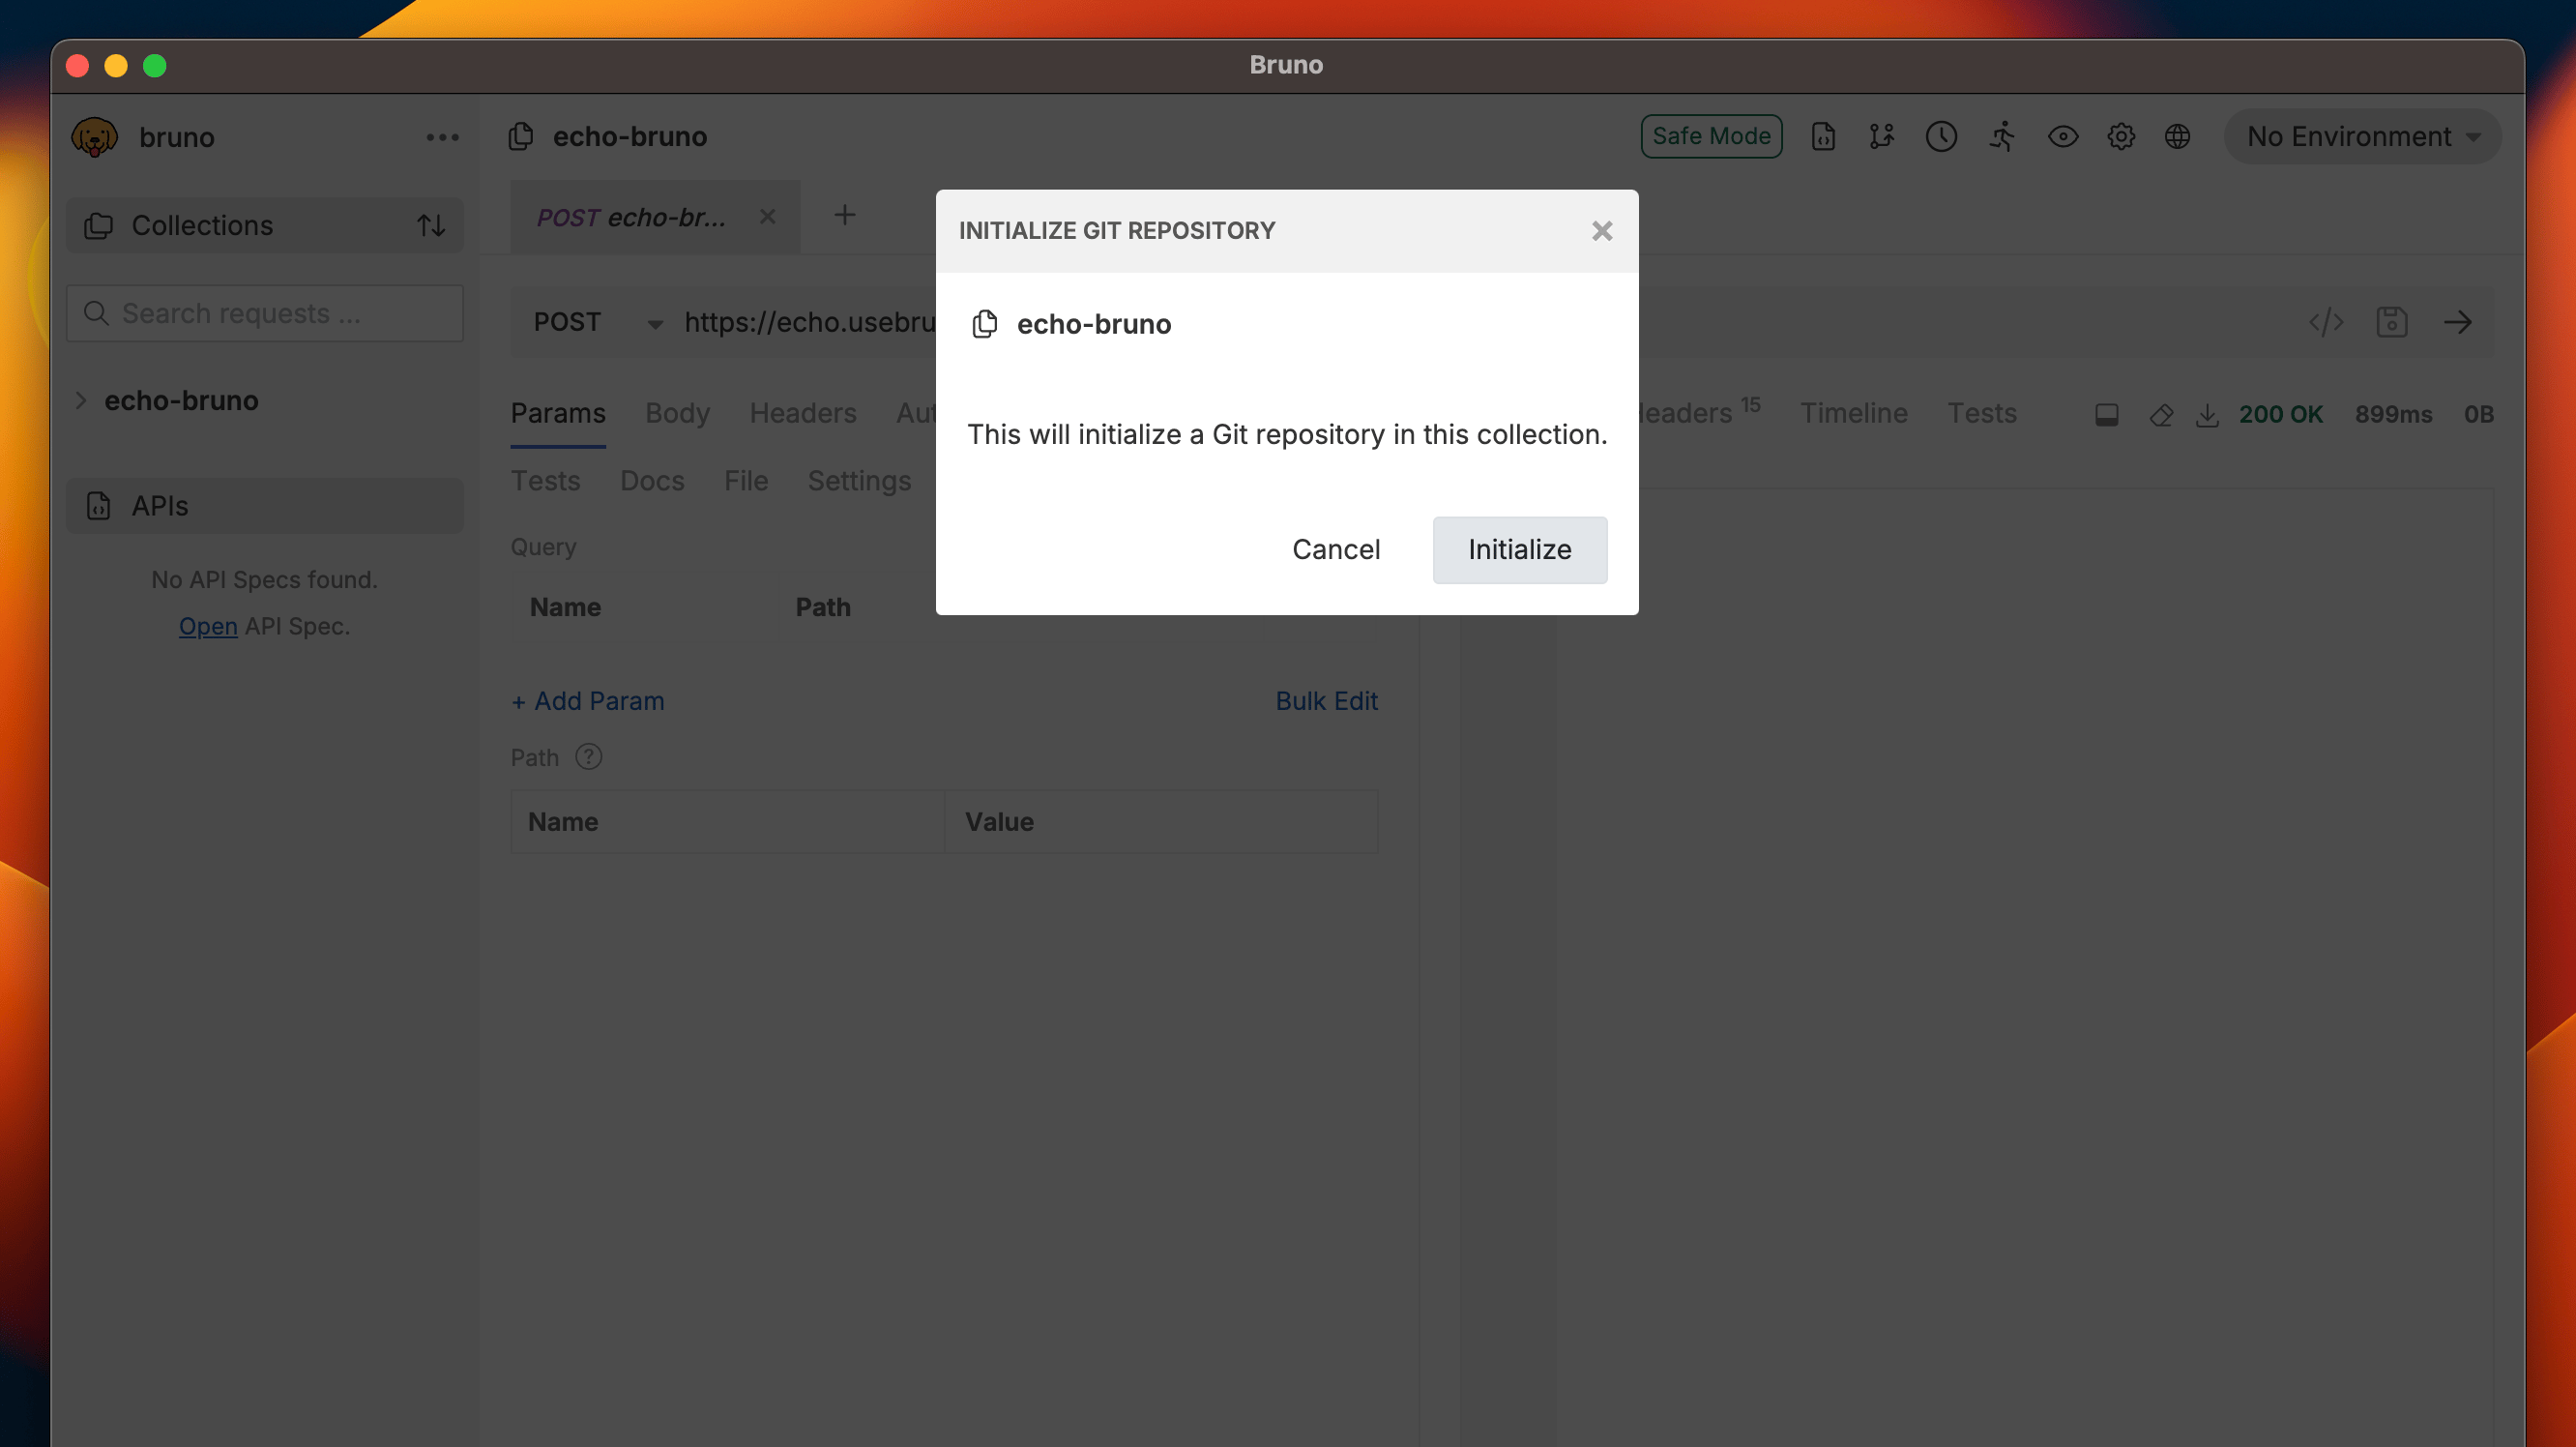
4. Click the **Initialize** button to set up your collection with Git.
This allows you to perform other Git operations such as adding, committing, pushing, pulling changes, and more.
## Connecting to Remote Repository
Once you have initialized your collection, the next step is to connect it to a remote Git repository.
You can directly connect to remote repository from Bruno using Git GUI feature.
To connect Bruno to GitHub, you need to set up either an SSH key or a Personal Access Token (PAT) on GitHub. Follow this [official GitHub guide ↗](https://docs.github.com/en/authentication/keeping-your-account-and-data-secure/managing-your-personal-access-tokens) to set it up.
1. Create empty Git repository on your GitHub.
2. Open **Git initialized** Bruno collection.
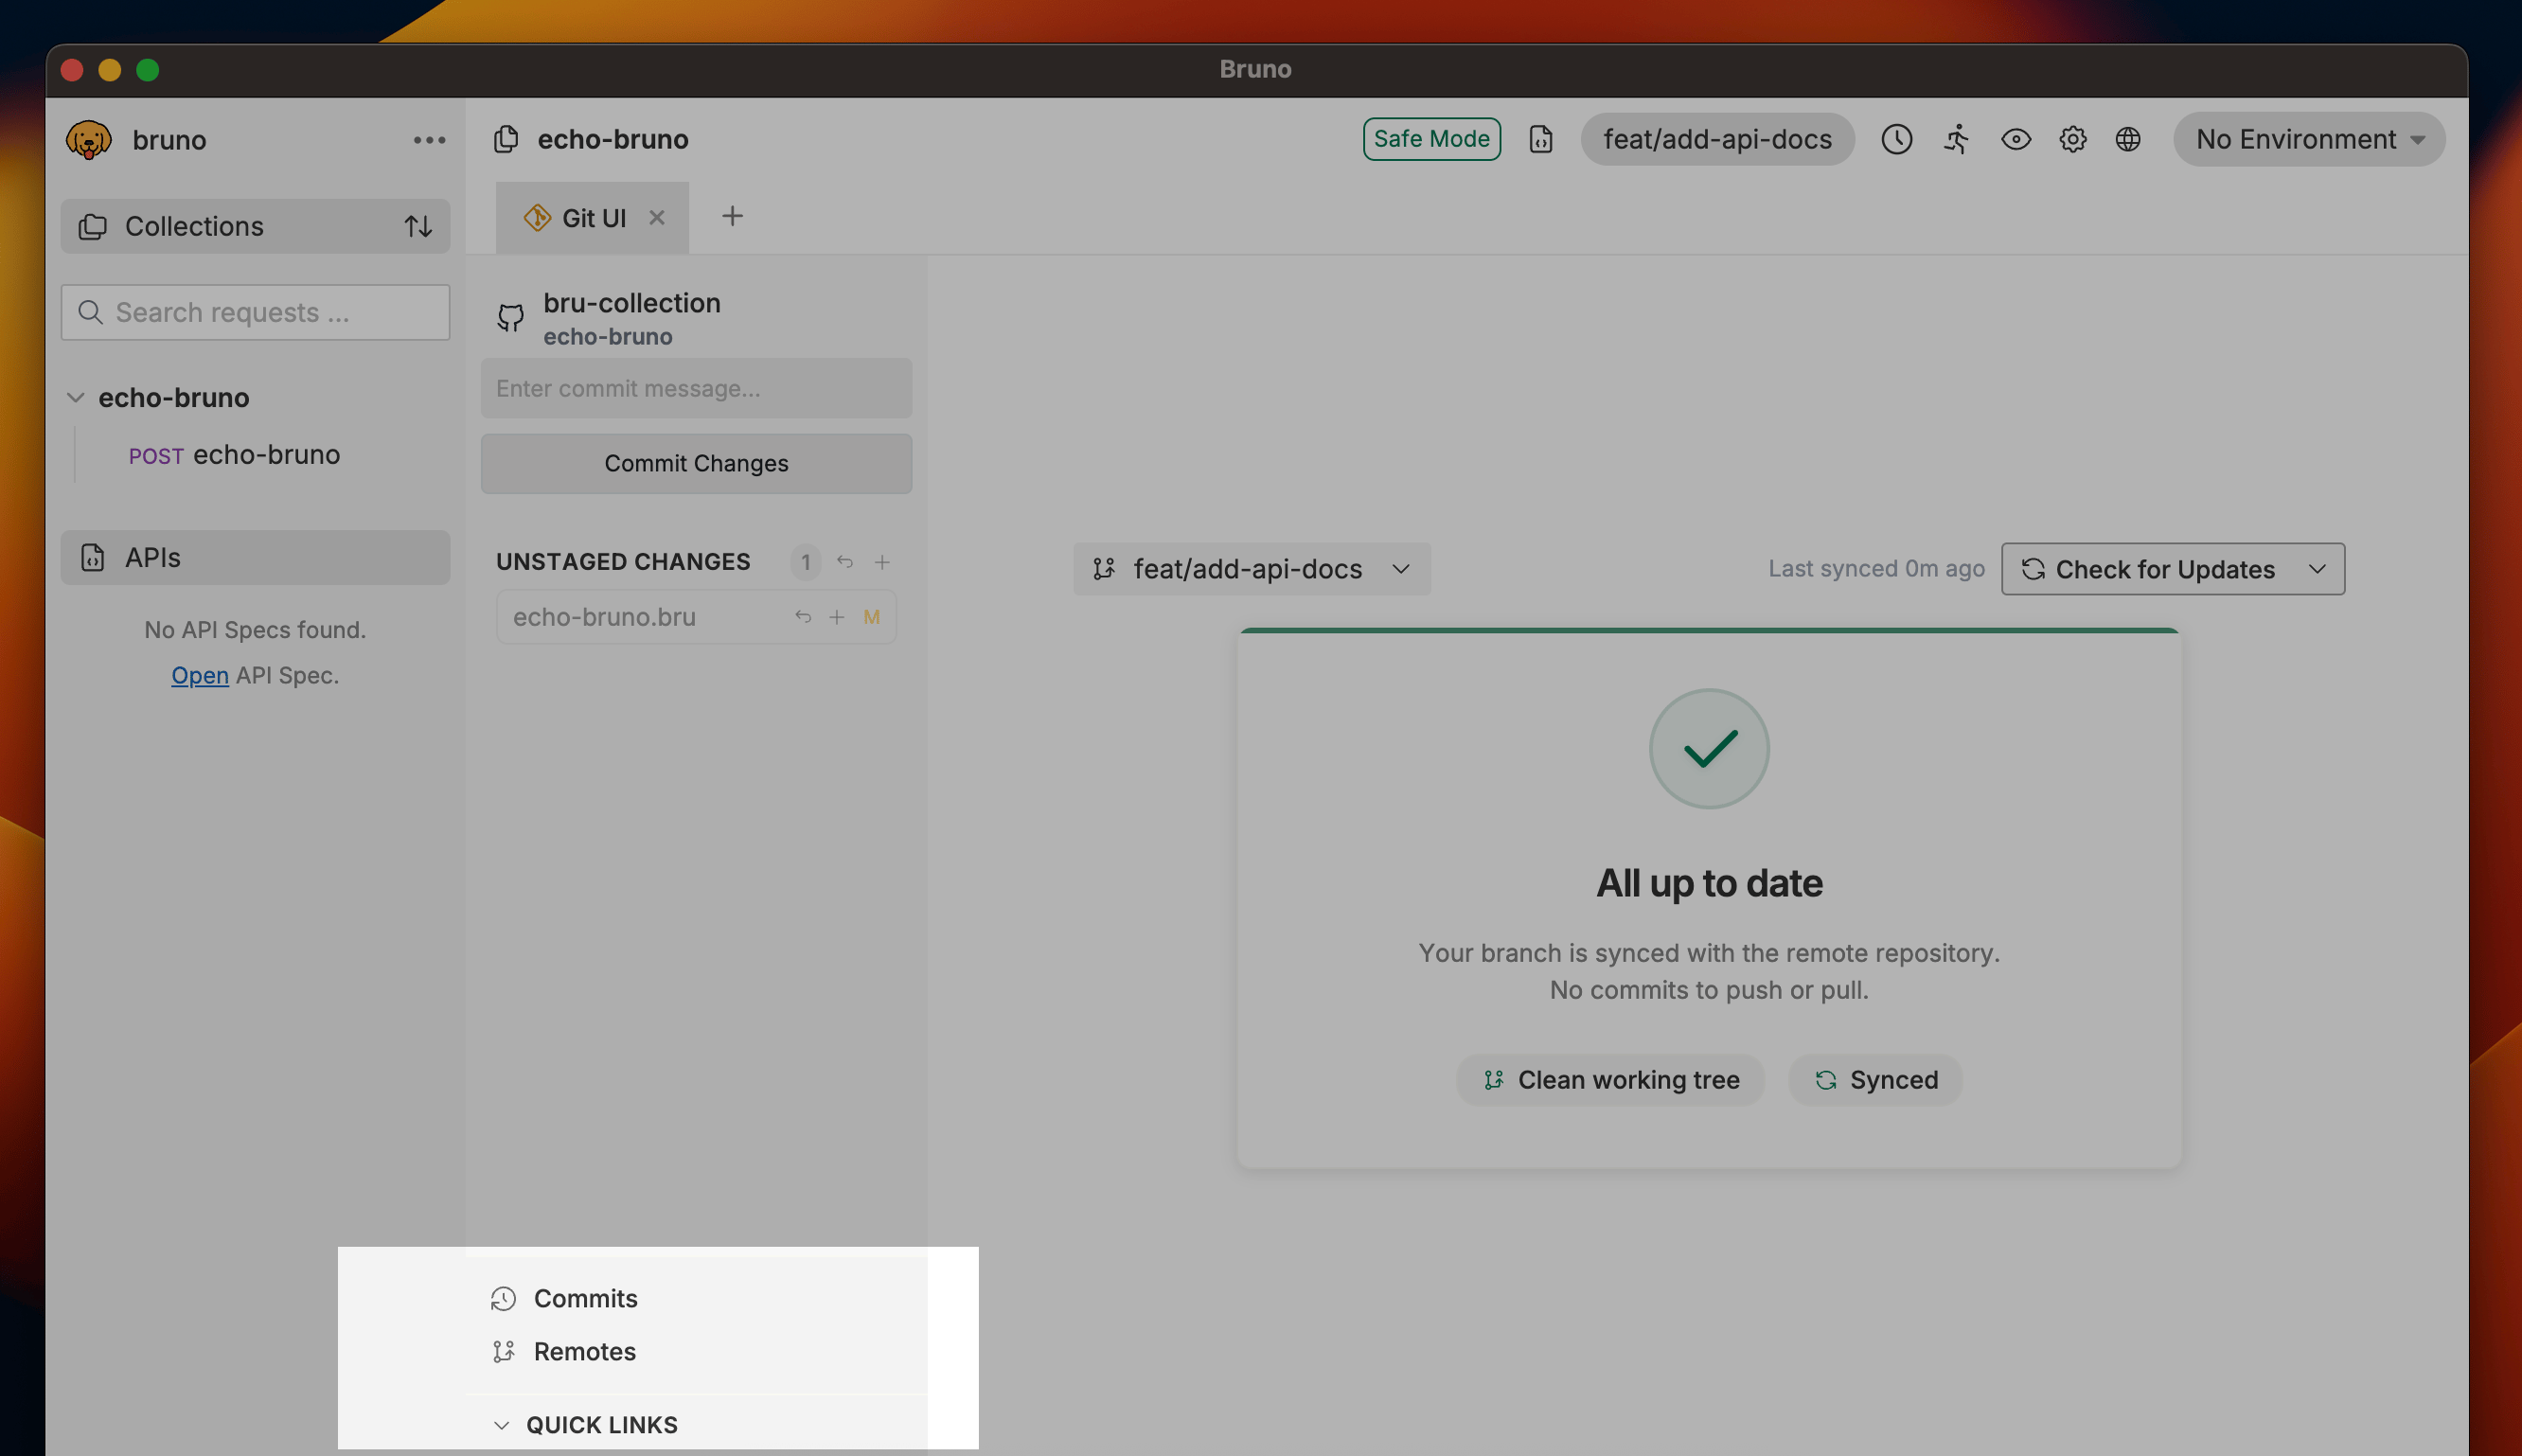
3. Click on **Quick Links** (bottom-left corner).
4. Select **Remotes** from the dropdown.
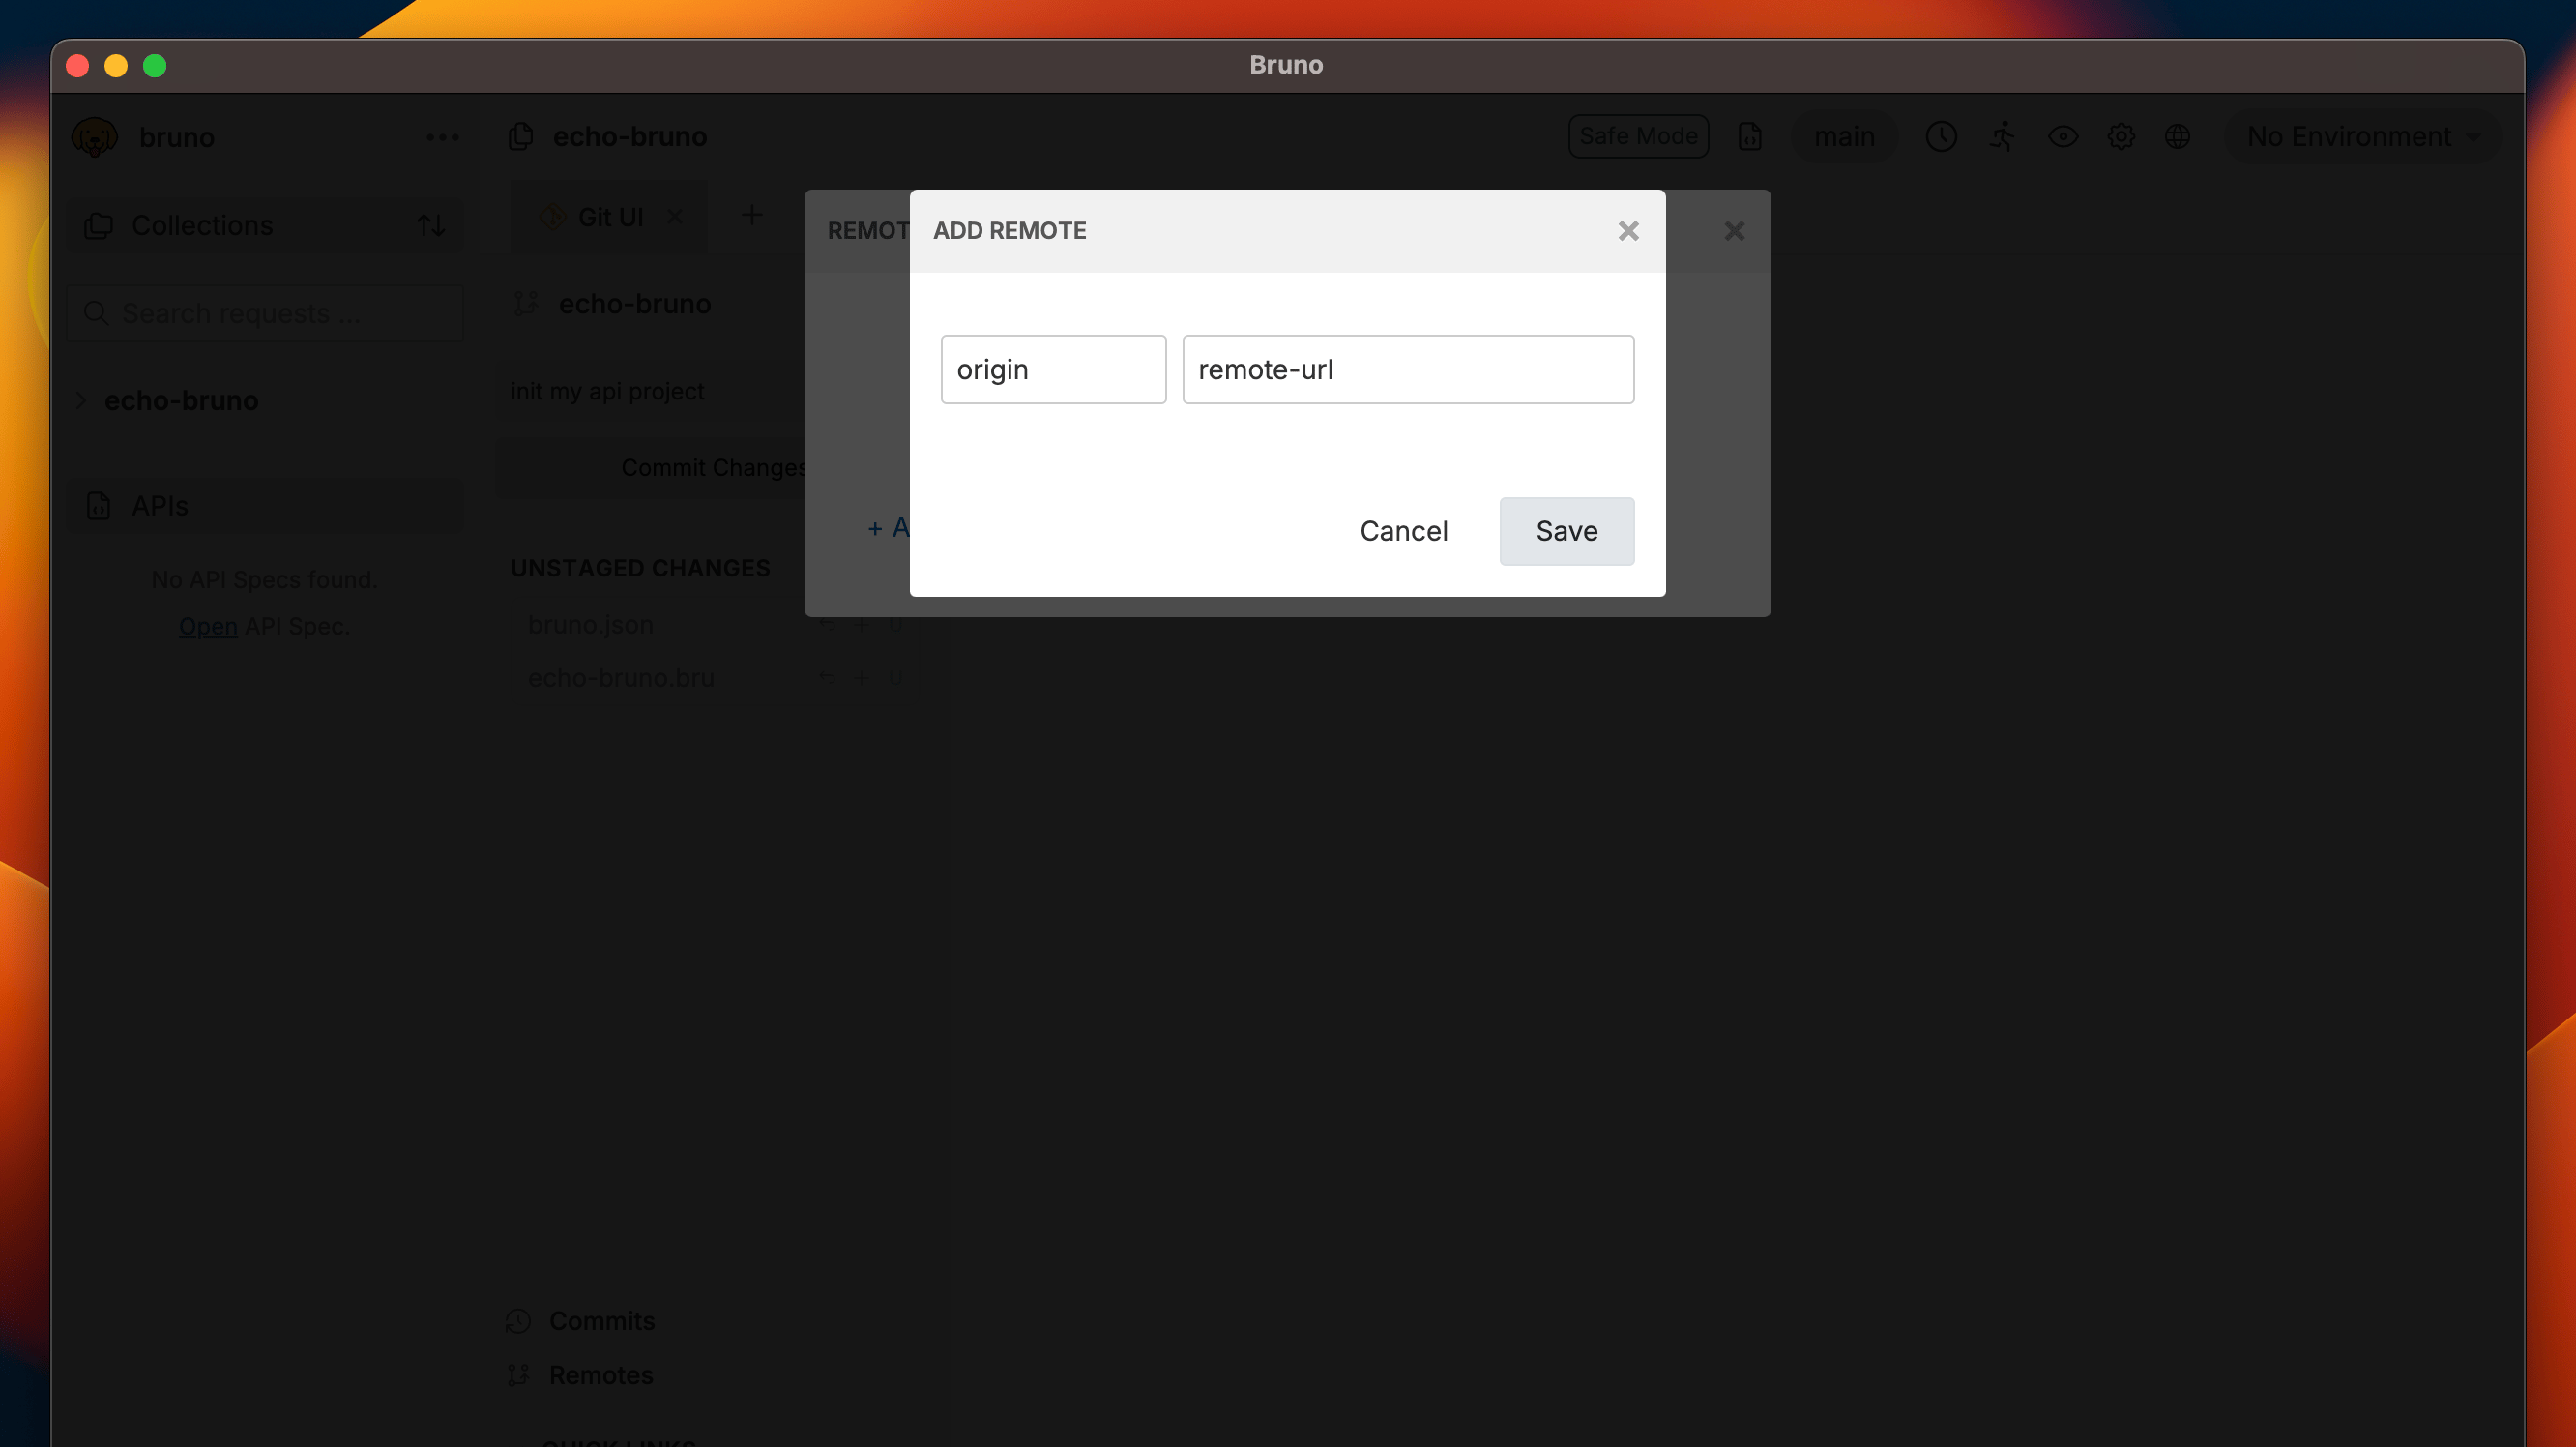
5. Click on **Add Remote** button.
6. Enter **Remote Name** and **URL** (Https or SSH) and click on save.
After completing the above steps, your collection will be connected to GitHub. We have to **add and commit** (see below) some changes to pushed collection to GitHub.
Once your collection is connected to the remote repository, you can manage it directly from the Bruno app.
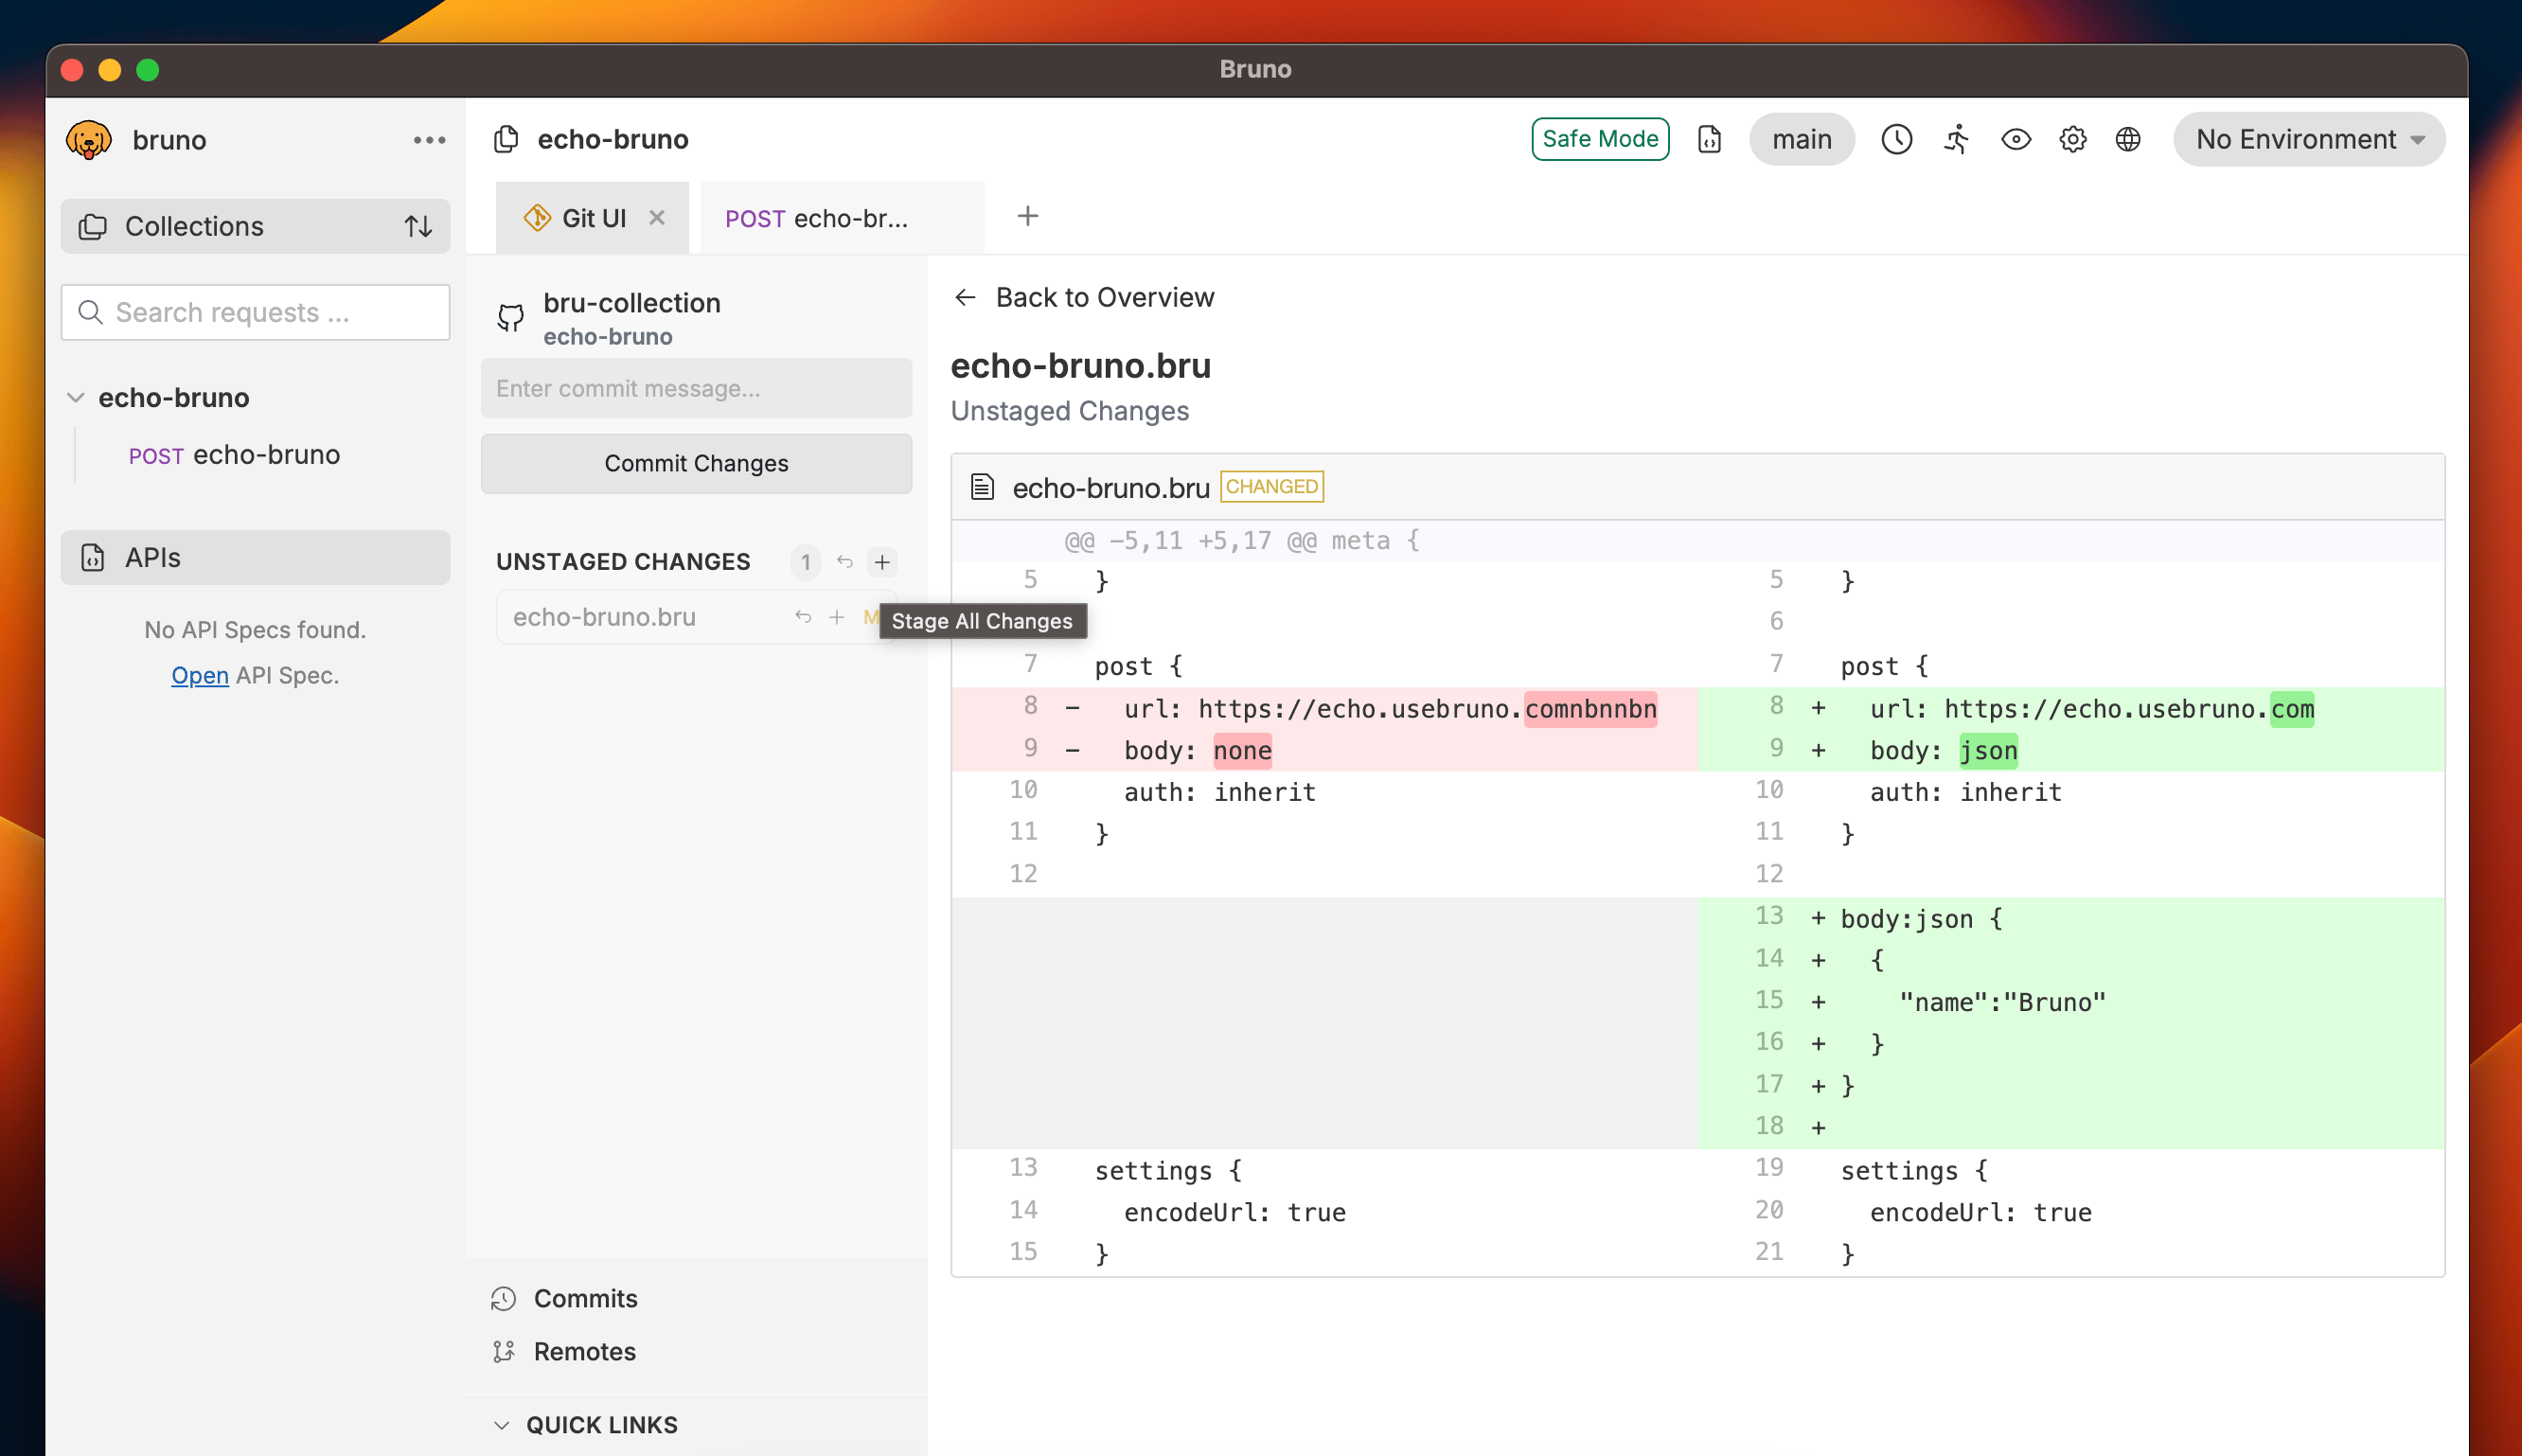
## Adding and Committing Changes
Once you've made changes to your collection in Bruno, you can easily commit those changes using the Git UI. This allows you to track changes and collaborate with your team efficiently.
Follow these steps to add and commit changes:
1. Go to **Git UI**.
2. Click on **Add Icon** to stage your changes.
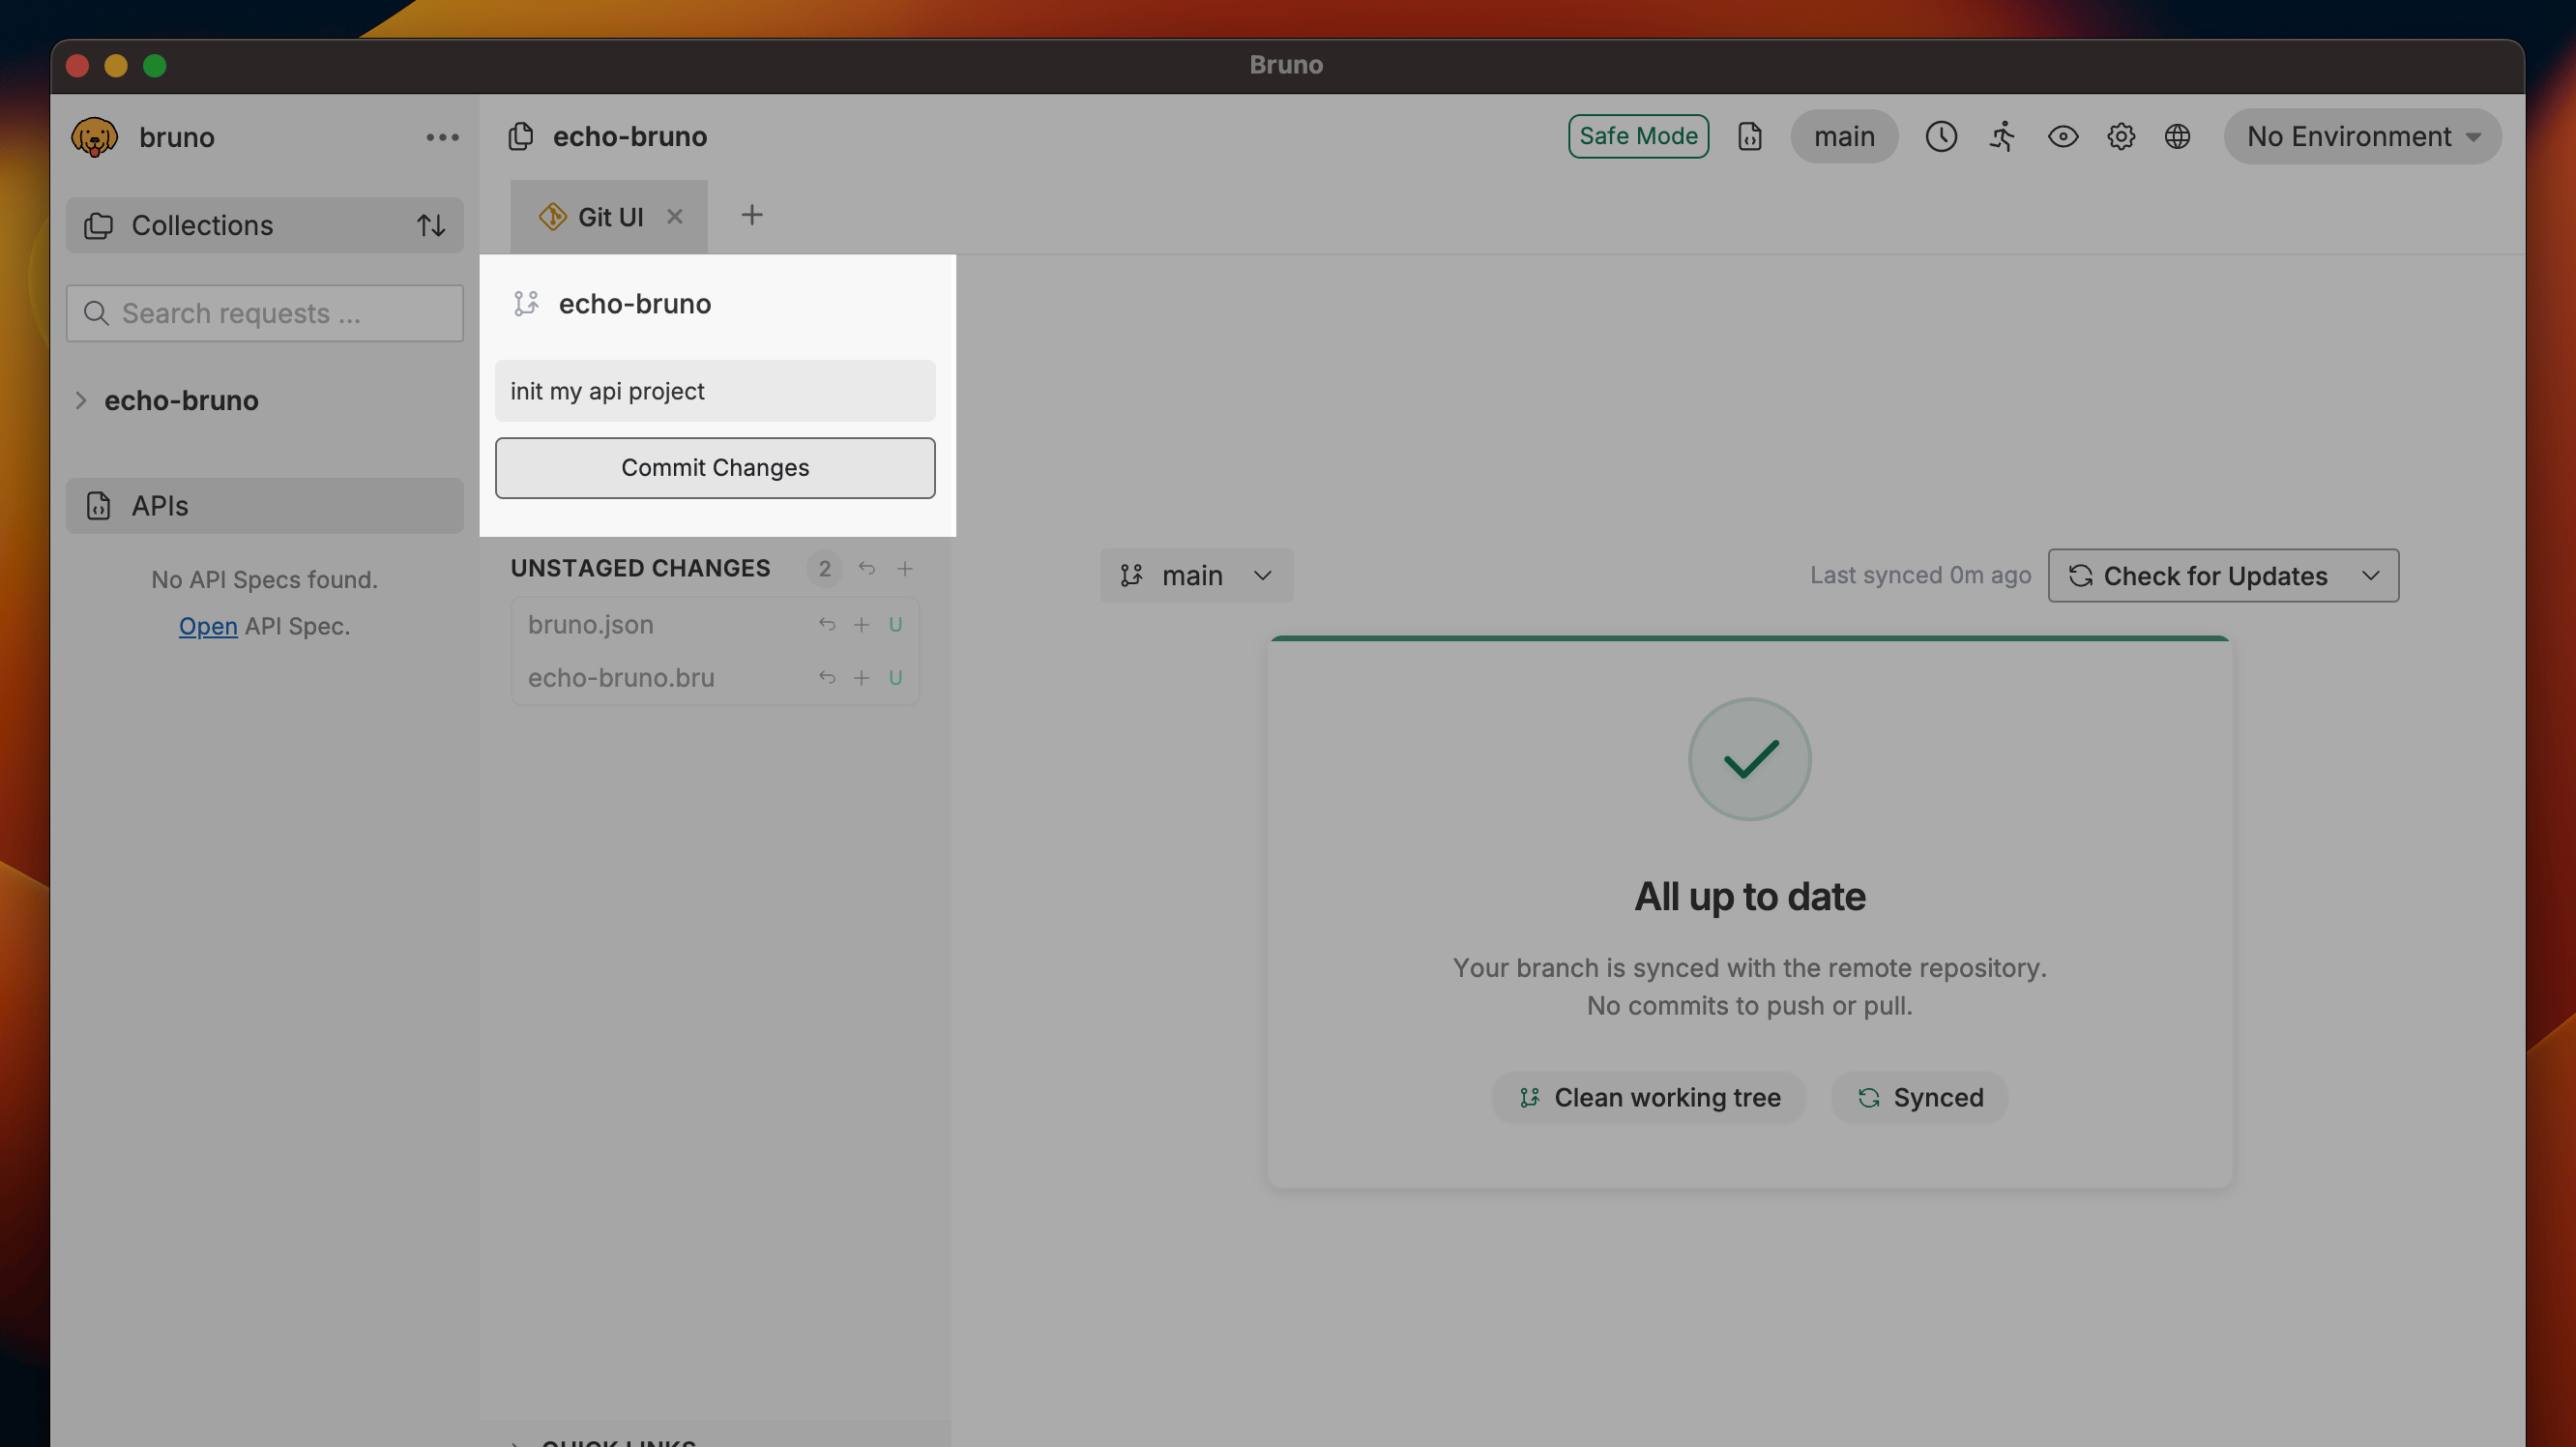
4. Click on **Commit Changes** button.
5. Write a Commit Message and click **Commit**.
> You can commit all changes in a single click by pressing the **Add All Changes** button.
By following these steps, your changes are now committed and tracked in Git, ready to be pushed or shared with others.
## Pushing and Pulling Changes
The GUI-based Git integration in Bruno allows both engineering and non-engineering teams to work together in a fast, efficient, and accurate manner. This integration ensures that your collections remain consistently up-to-date across all team members.
> Before you can push or pull changes, ensure that the **remote repository** is linked to your project.
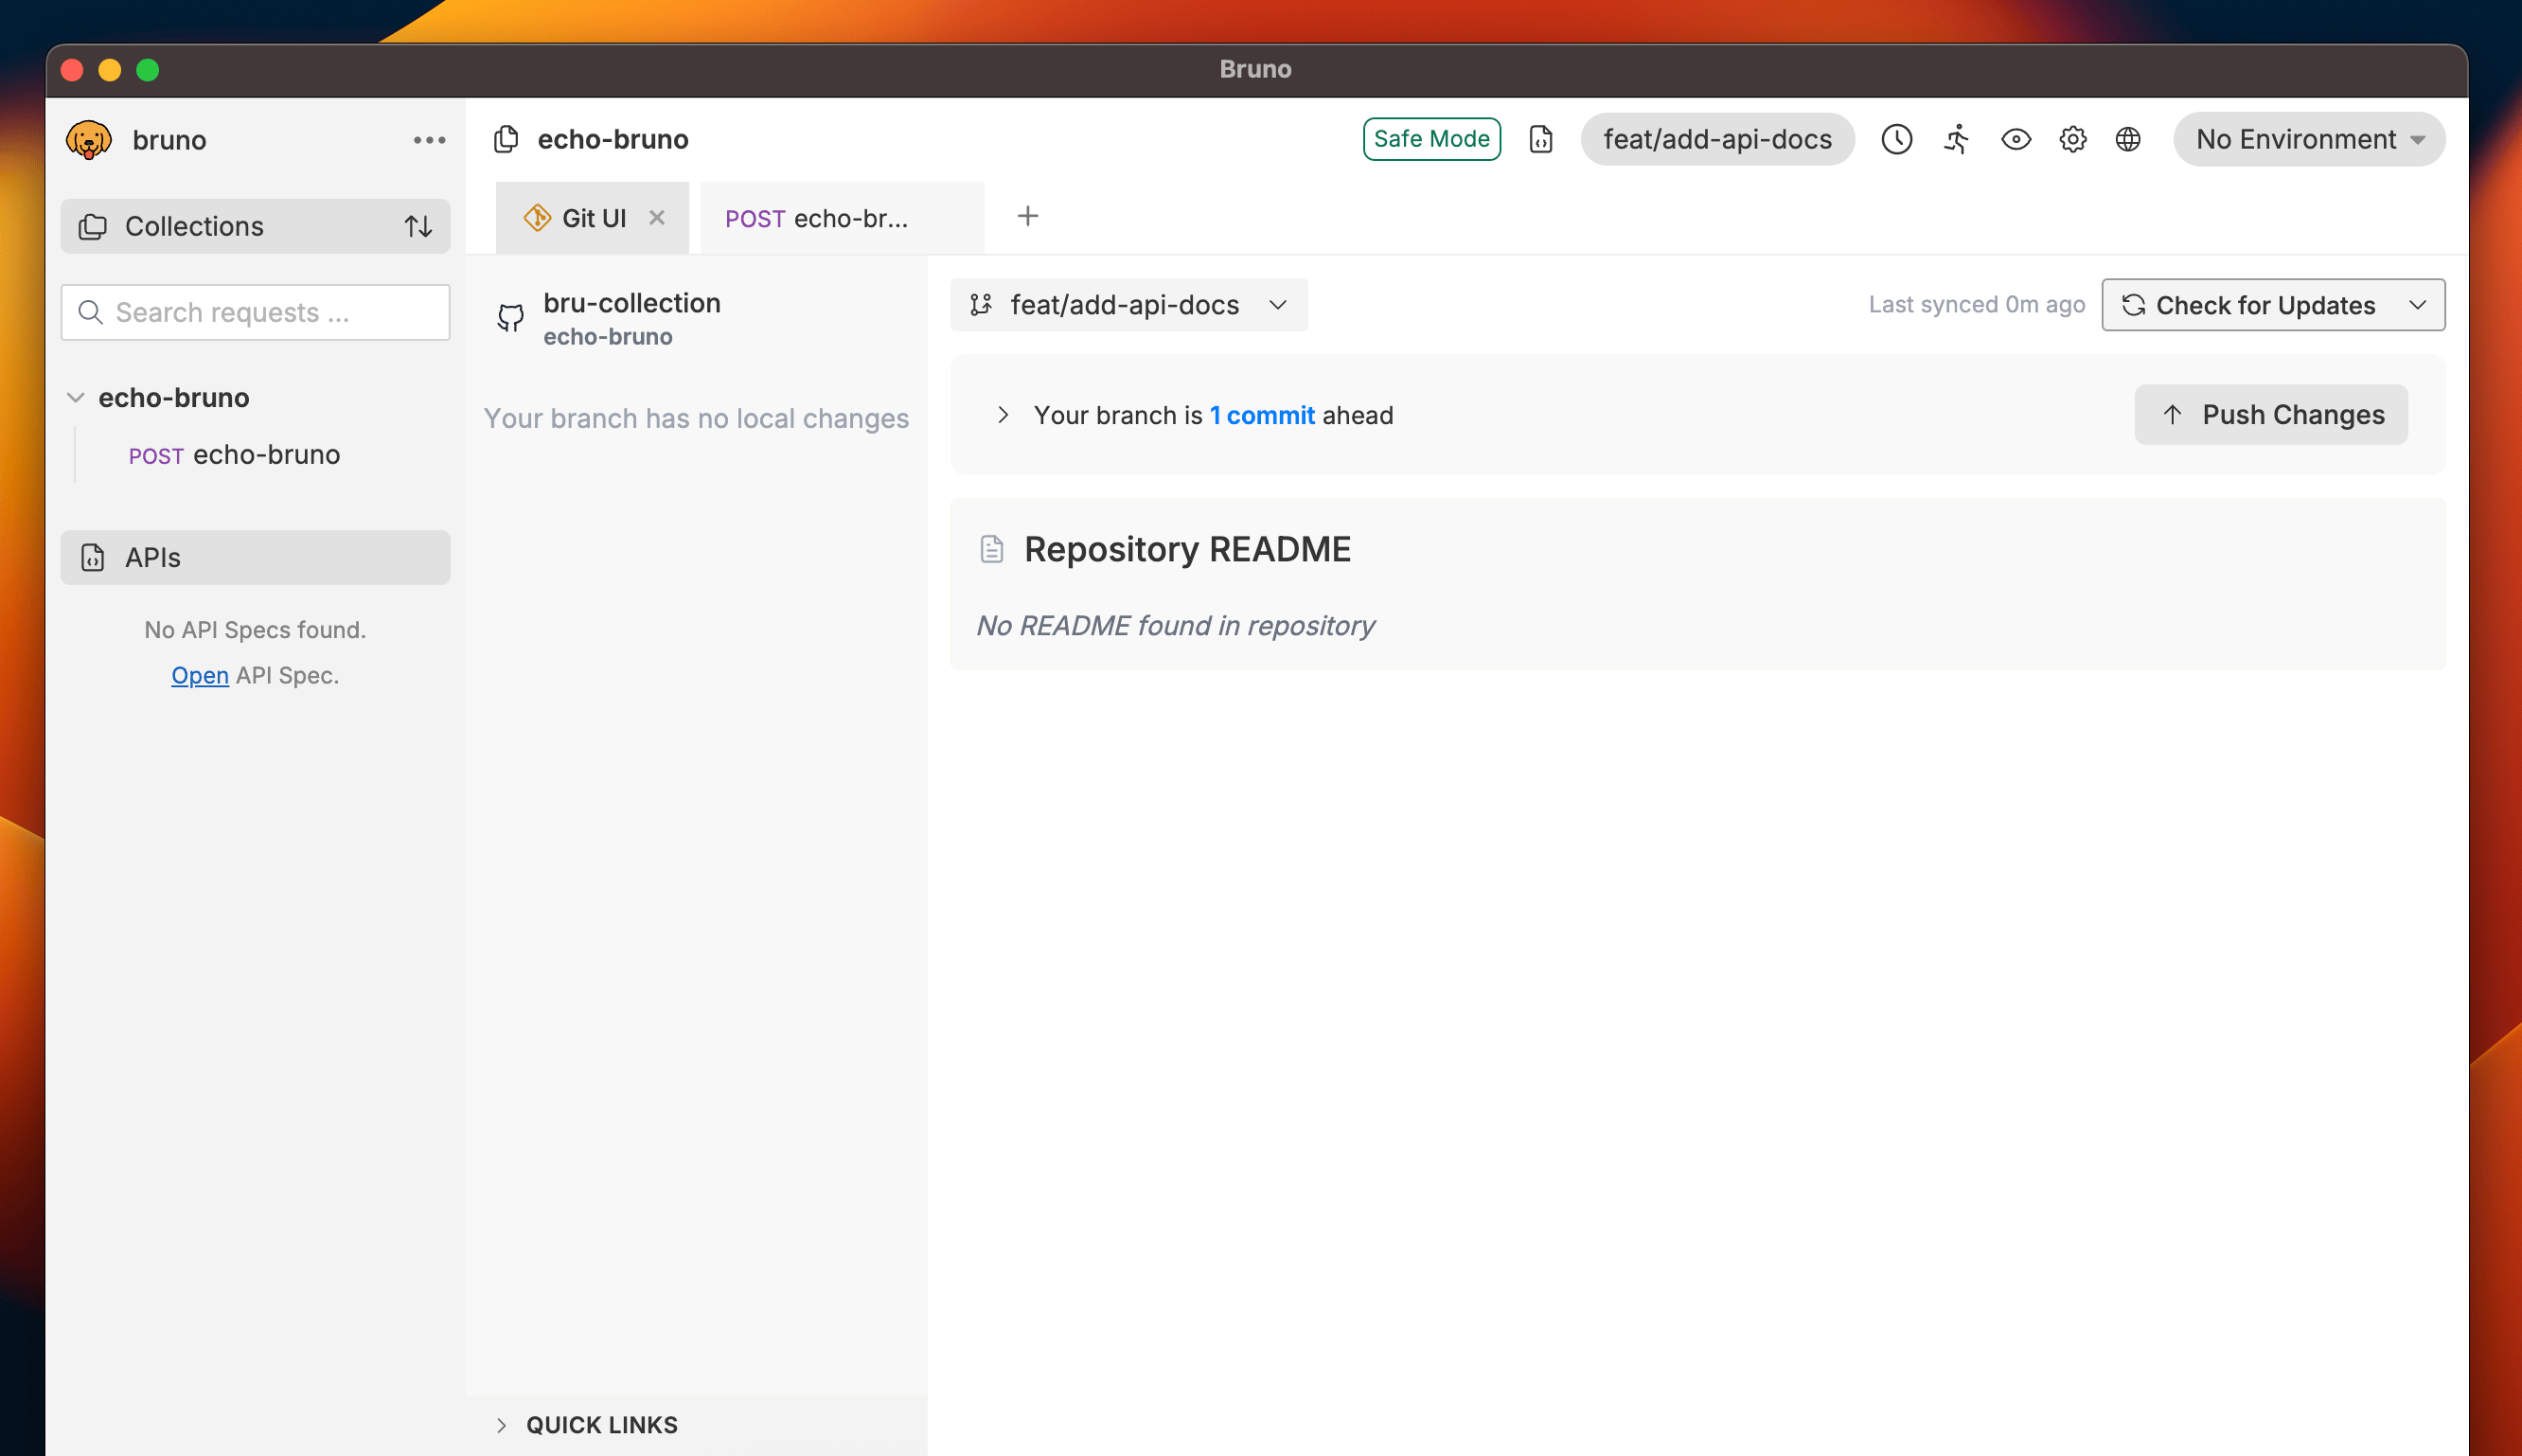
### Pushing Changes
Push your local changes to the remote repository with just a few clicks.
1. Click on **Git UI** and toggle **Check for Updates** button.
2. Select **Push to** and confirm the **Remote Server** configurations.
3. Click on **Push** button.
Now you can see all your local changes pushed to the remote repository.
> Follow Consumer guide to learn about pulling changes feature.
## Branch Creation and Checkout
With branches in **Bruno**, you can manage your code effectively by isolating different features or tasks.
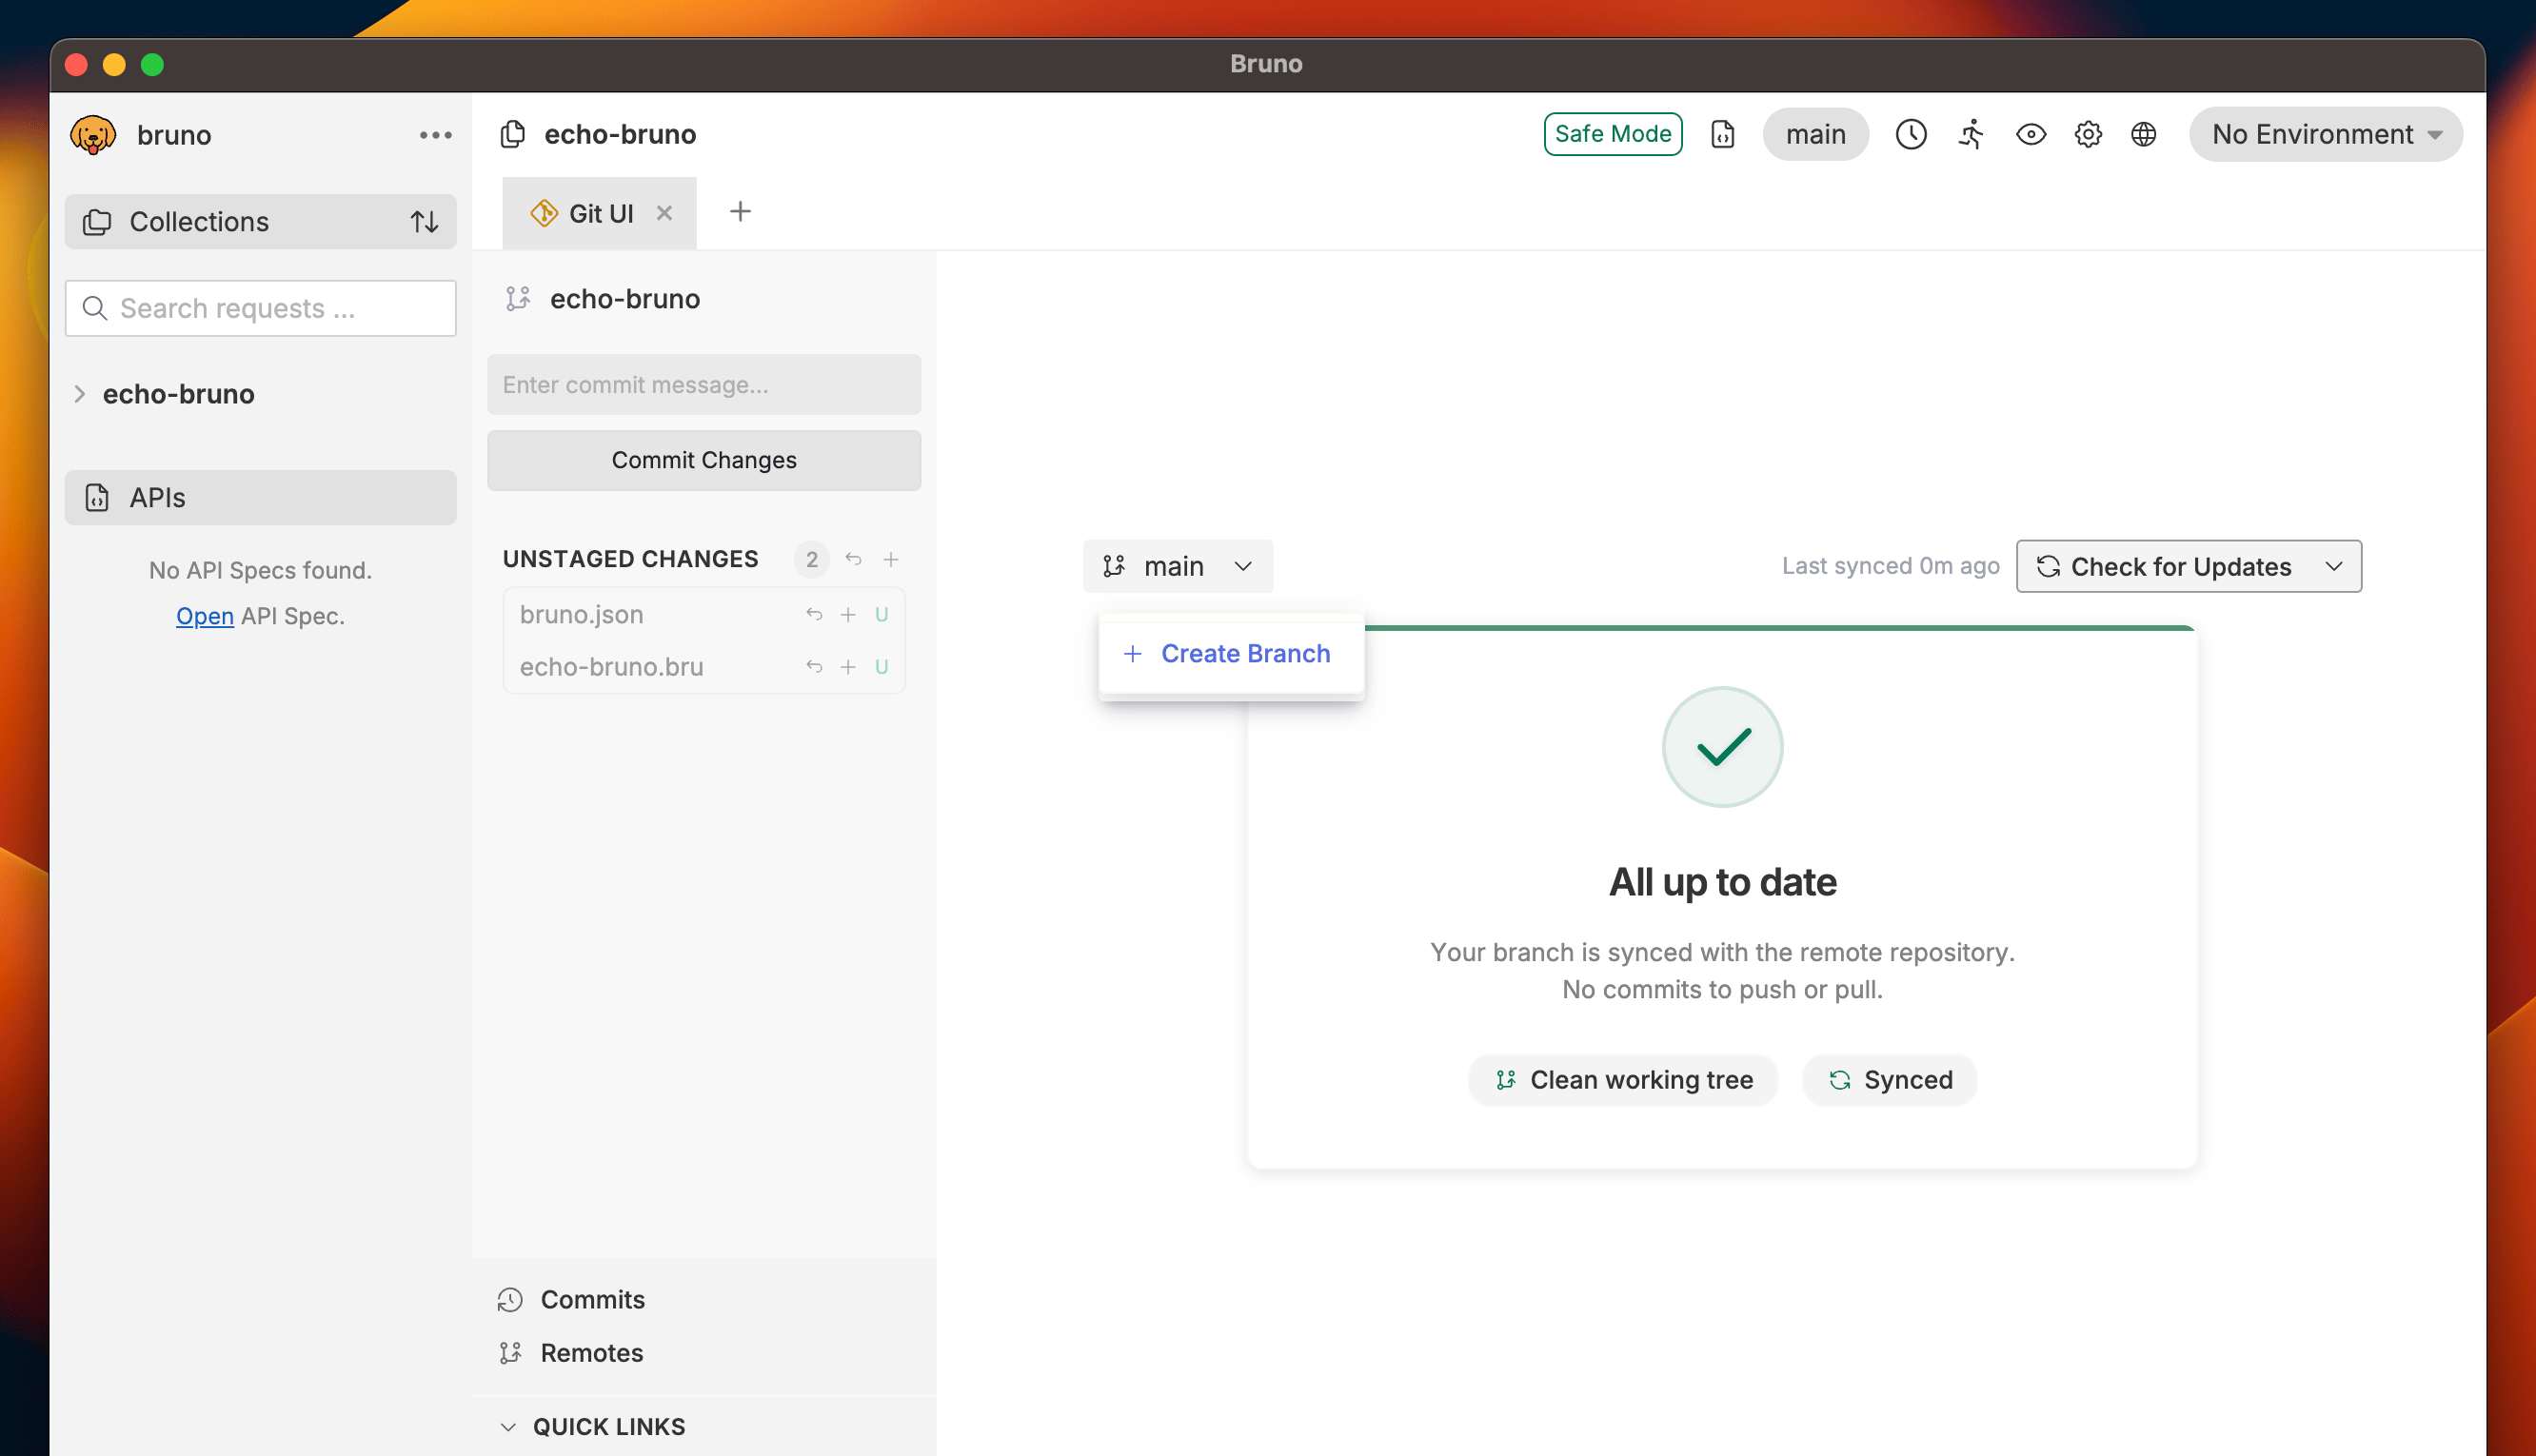
### Creating Branches
Follow the below steps to create branches in Bruno.
1. Go to **Git UI**.
2. Click on **main** and select **Create Branch** from dropdown.
3. Enter **Branch Name**.
4. Click on **Save** button.
Once the branch is created, you can start making changes to the branch.
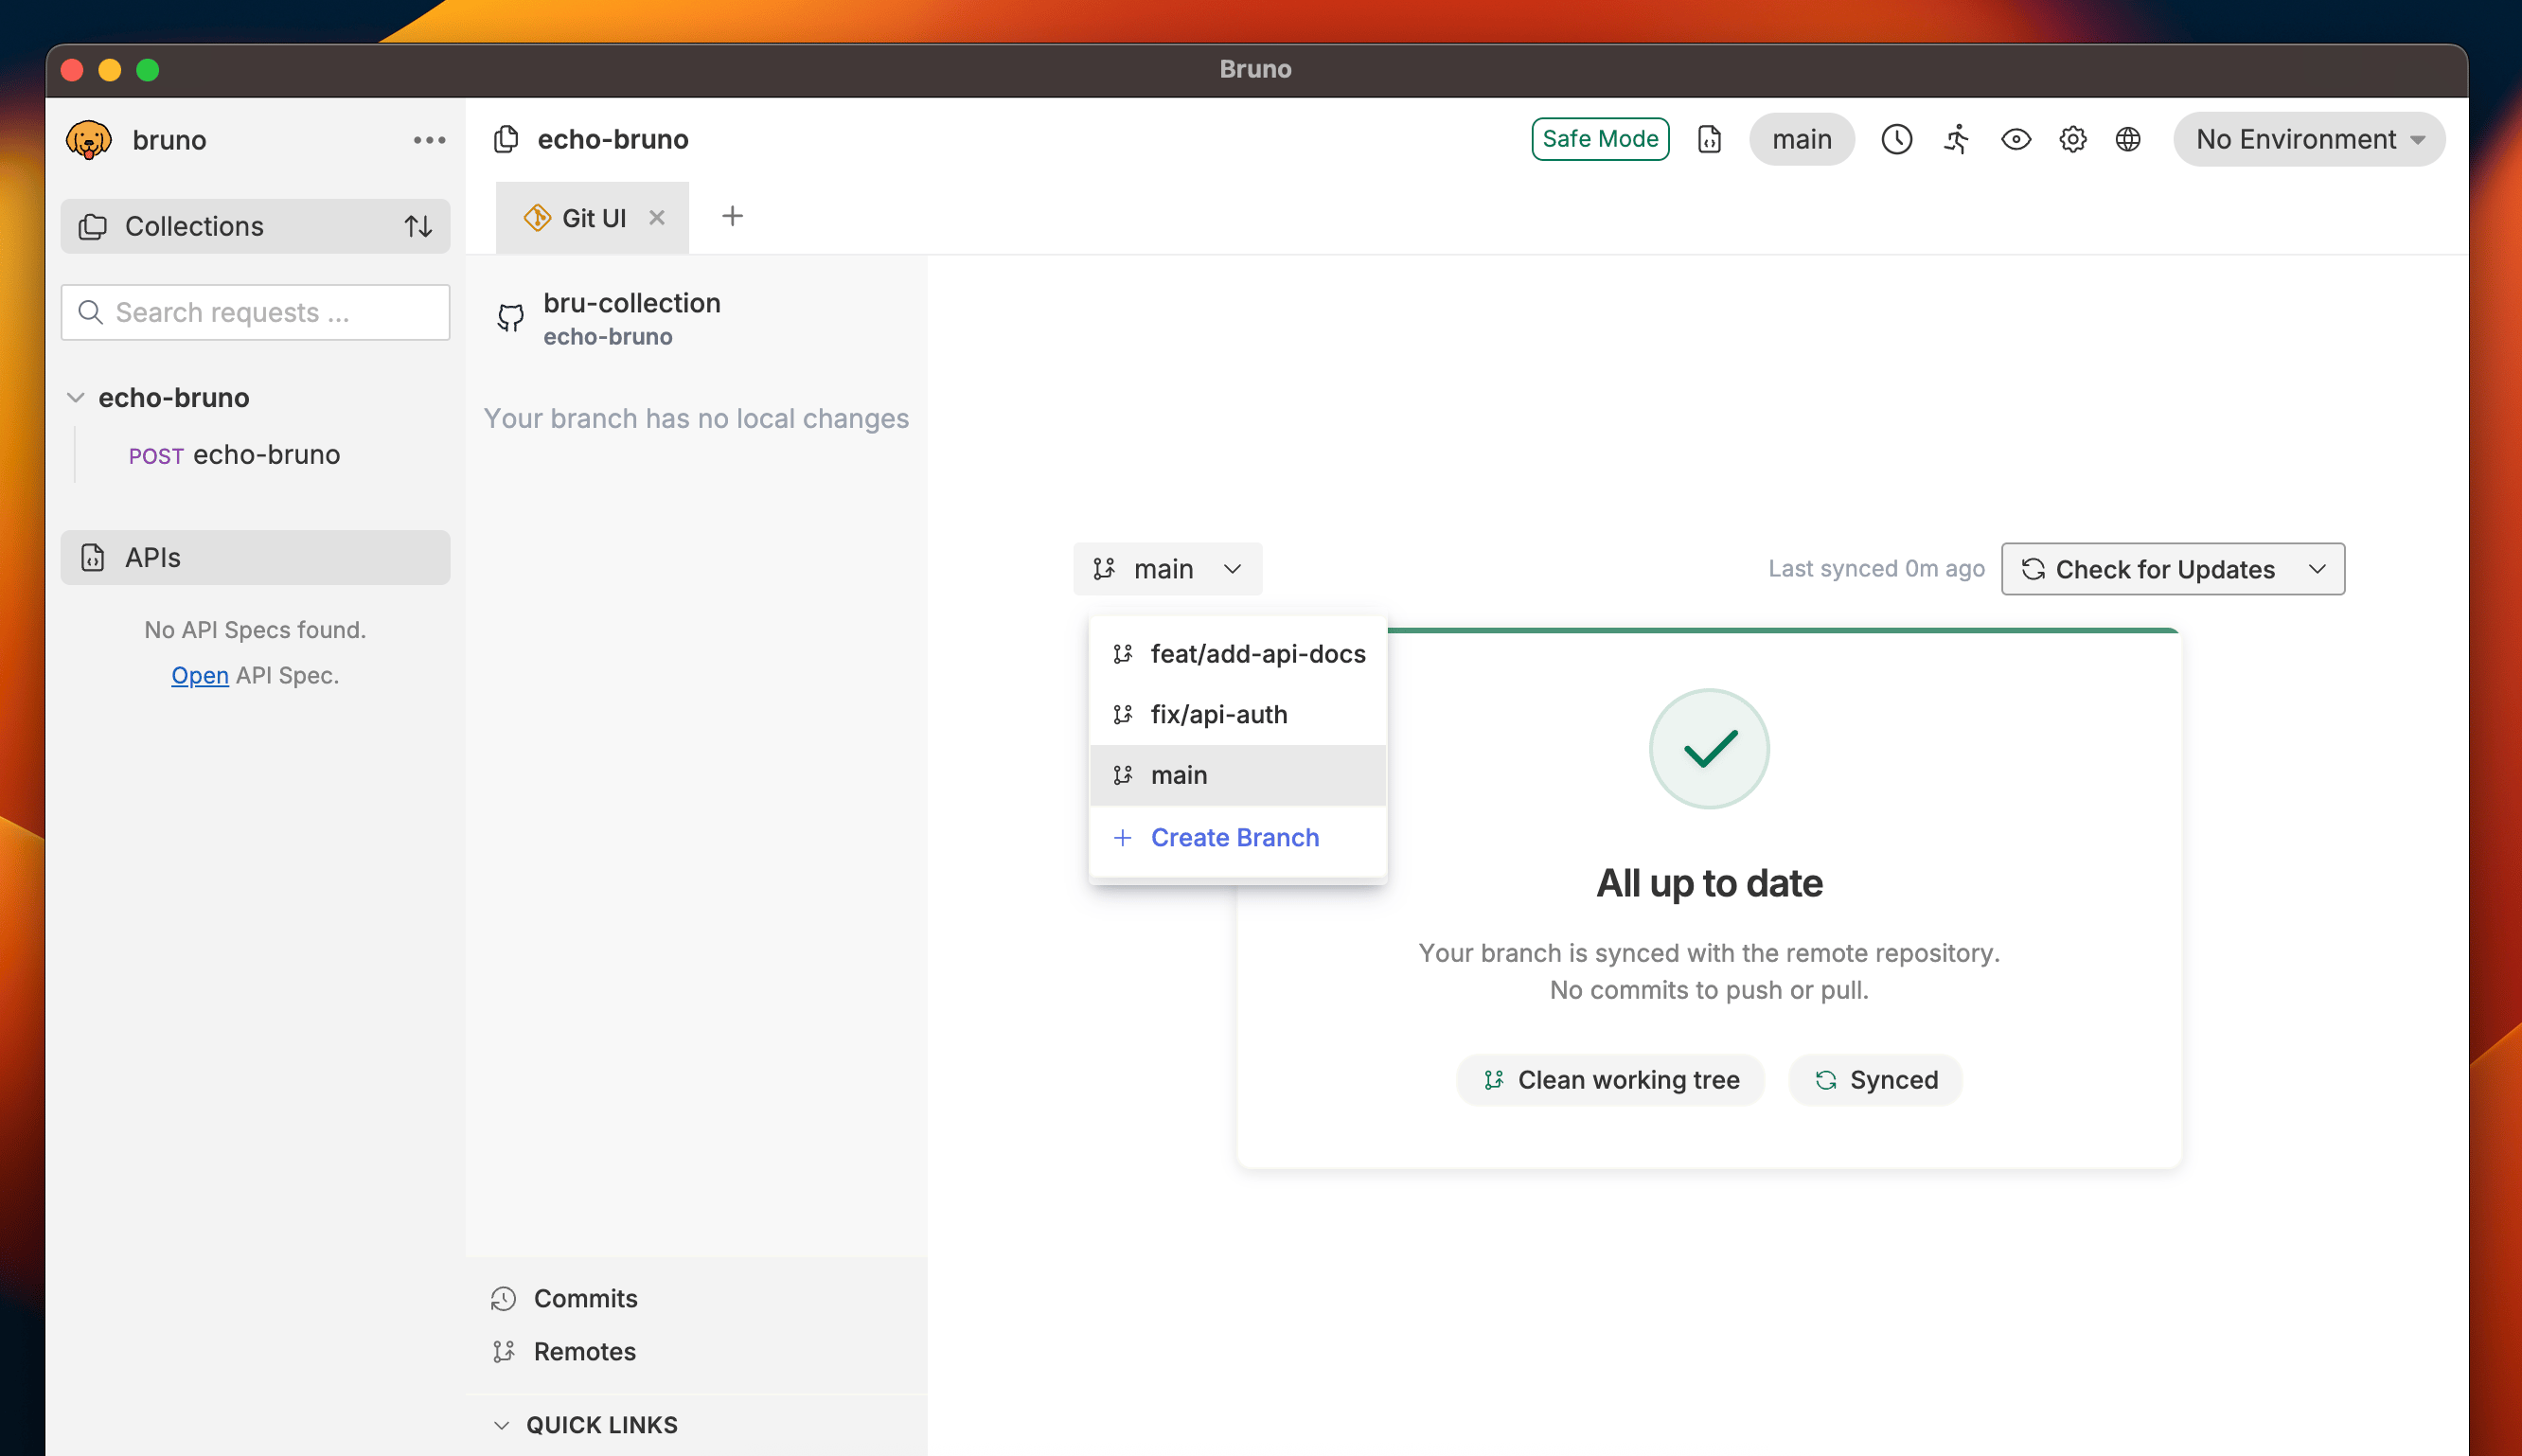
### Branch Checkout
1. Click on **main**.
2. Select the branch you want to switch.
3. Now you're switched to your selected branch.
 4. Click the **Initialize** button to set up your collection with Git.
 This allows you to perform other Git operations such as adding, committing, pushing, pulling changes, and more.
## Connecting to Remote Repository
Once you have initialized your collection, the next step is to connect it to a remote Git repository.
You can directly connect to remote repository from Bruno using Git GUI feature.
To connect Bruno to GitHub, you need to set up either an SSH key or a Personal Access Token (PAT) on GitHub. Follow this [official GitHub guide ↗](https://docs.github.com/en/authentication/keeping-your-account-and-data-secure/managing-your-personal-access-tokens) to set it up.
1. Create empty Git repository on your GitHub.
2. Open **Git initialized** Bruno collection.
3. Click on **Quick Links** (bottom-left corner).
4. Select **Remotes** from the dropdown.
This allows you to perform other Git operations such as adding, committing, pushing, pulling changes, and more.
## Connecting to Remote Repository
Once you have initialized your collection, the next step is to connect it to a remote Git repository.
You can directly connect to remote repository from Bruno using Git GUI feature.
To connect Bruno to GitHub, you need to set up either an SSH key or a Personal Access Token (PAT) on GitHub. Follow this [official GitHub guide ↗](https://docs.github.com/en/authentication/keeping-your-account-and-data-secure/managing-your-personal-access-tokens) to set it up.
1. Create empty Git repository on your GitHub.
2. Open **Git initialized** Bruno collection.
3. Click on **Quick Links** (bottom-left corner).
4. Select **Remotes** from the dropdown.
 5. Click on **Add Remote** button.
6. Enter **Remote Name** and **URL** (Https or SSH) and click on save.
5. Click on **Add Remote** button.
6. Enter **Remote Name** and **URL** (Https or SSH) and click on save.
 After completing the above steps, your collection will be connected to GitHub. We have to **add and commit** (see below) some changes to pushed collection to GitHub.
Once your collection is connected to the remote repository, you can manage it directly from the Bruno app.
## Adding and Committing Changes
Once you've made changes to your collection in Bruno, you can easily commit those changes using the Git UI. This allows you to track changes and collaborate with your team efficiently.
Follow these steps to add and commit changes:
1. Go to **Git UI**.
2. Click on **Add Icon** to stage your changes.
After completing the above steps, your collection will be connected to GitHub. We have to **add and commit** (see below) some changes to pushed collection to GitHub.
Once your collection is connected to the remote repository, you can manage it directly from the Bruno app.
## Adding and Committing Changes
Once you've made changes to your collection in Bruno, you can easily commit those changes using the Git UI. This allows you to track changes and collaborate with your team efficiently.
Follow these steps to add and commit changes:
1. Go to **Git UI**.
2. Click on **Add Icon** to stage your changes.
 4. Click on **Commit Changes** button.
5. Write a Commit Message and click **Commit**.
4. Click on **Commit Changes** button.
5. Write a Commit Message and click **Commit**.
 > You can commit all changes in a single click by pressing the **Add All Changes** button.
By following these steps, your changes are now committed and tracked in Git, ready to be pushed or shared with others.
## Pushing and Pulling Changes
The GUI-based Git integration in Bruno allows both engineering and non-engineering teams to work together in a fast, efficient, and accurate manner. This integration ensures that your collections remain consistently up-to-date across all team members.
> Before you can push or pull changes, ensure that the **remote repository** is linked to your project.
### Pushing Changes
Push your local changes to the remote repository with just a few clicks.
1. Click on **Git UI** and toggle **Check for Updates** button.
2. Select **Push to** and confirm the **Remote Server** configurations.
3. Click on **Push** button.
> You can commit all changes in a single click by pressing the **Add All Changes** button.
By following these steps, your changes are now committed and tracked in Git, ready to be pushed or shared with others.
## Pushing and Pulling Changes
The GUI-based Git integration in Bruno allows both engineering and non-engineering teams to work together in a fast, efficient, and accurate manner. This integration ensures that your collections remain consistently up-to-date across all team members.
> Before you can push or pull changes, ensure that the **remote repository** is linked to your project.
### Pushing Changes
Push your local changes to the remote repository with just a few clicks.
1. Click on **Git UI** and toggle **Check for Updates** button.
2. Select **Push to** and confirm the **Remote Server** configurations.
3. Click on **Push** button.
 Now you can see all your local changes pushed to the remote repository.
> Follow Consumer guide to learn about pulling changes feature.
## Branch Creation and Checkout
With branches in **Bruno**, you can manage your code effectively by isolating different features or tasks.
### Creating Branches
Follow the below steps to create branches in Bruno.
1. Go to **Git UI**.
2. Click on **main** and select **Create Branch** from dropdown.
3. Enter **Branch Name**.
4. Click on **Save** button.
Now you can see all your local changes pushed to the remote repository.
> Follow Consumer guide to learn about pulling changes feature.
## Branch Creation and Checkout
With branches in **Bruno**, you can manage your code effectively by isolating different features or tasks.
### Creating Branches
Follow the below steps to create branches in Bruno.
1. Go to **Git UI**.
2. Click on **main** and select **Create Branch** from dropdown.
3. Enter **Branch Name**.
4. Click on **Save** button.
 Once the branch is created, you can start making changes to the branch.
### Branch Checkout
1. Click on **main**.
2. Select the branch you want to switch.
Once the branch is created, you can start making changes to the branch.
### Branch Checkout
1. Click on **main**.
2. Select the branch you want to switch.
 3. Now you're switched to your selected branch.